
StoryMap: Plugin for Jira
When starting a new project you never know which expertise you may need and sometimes you have to learn something new. Today, we would like to share a case about Jira's plugin called Storymap. It is a roadmapping tool for Jira that helps to decompose any projects and manage workload by creating microtasks or importing them from Jira. Let’s dive into the design process.
Overview
Storymap is a plugin for Jira that allows assigning tasks in a linear sequence, thanks to that users can see the whole process by visual demonstration.
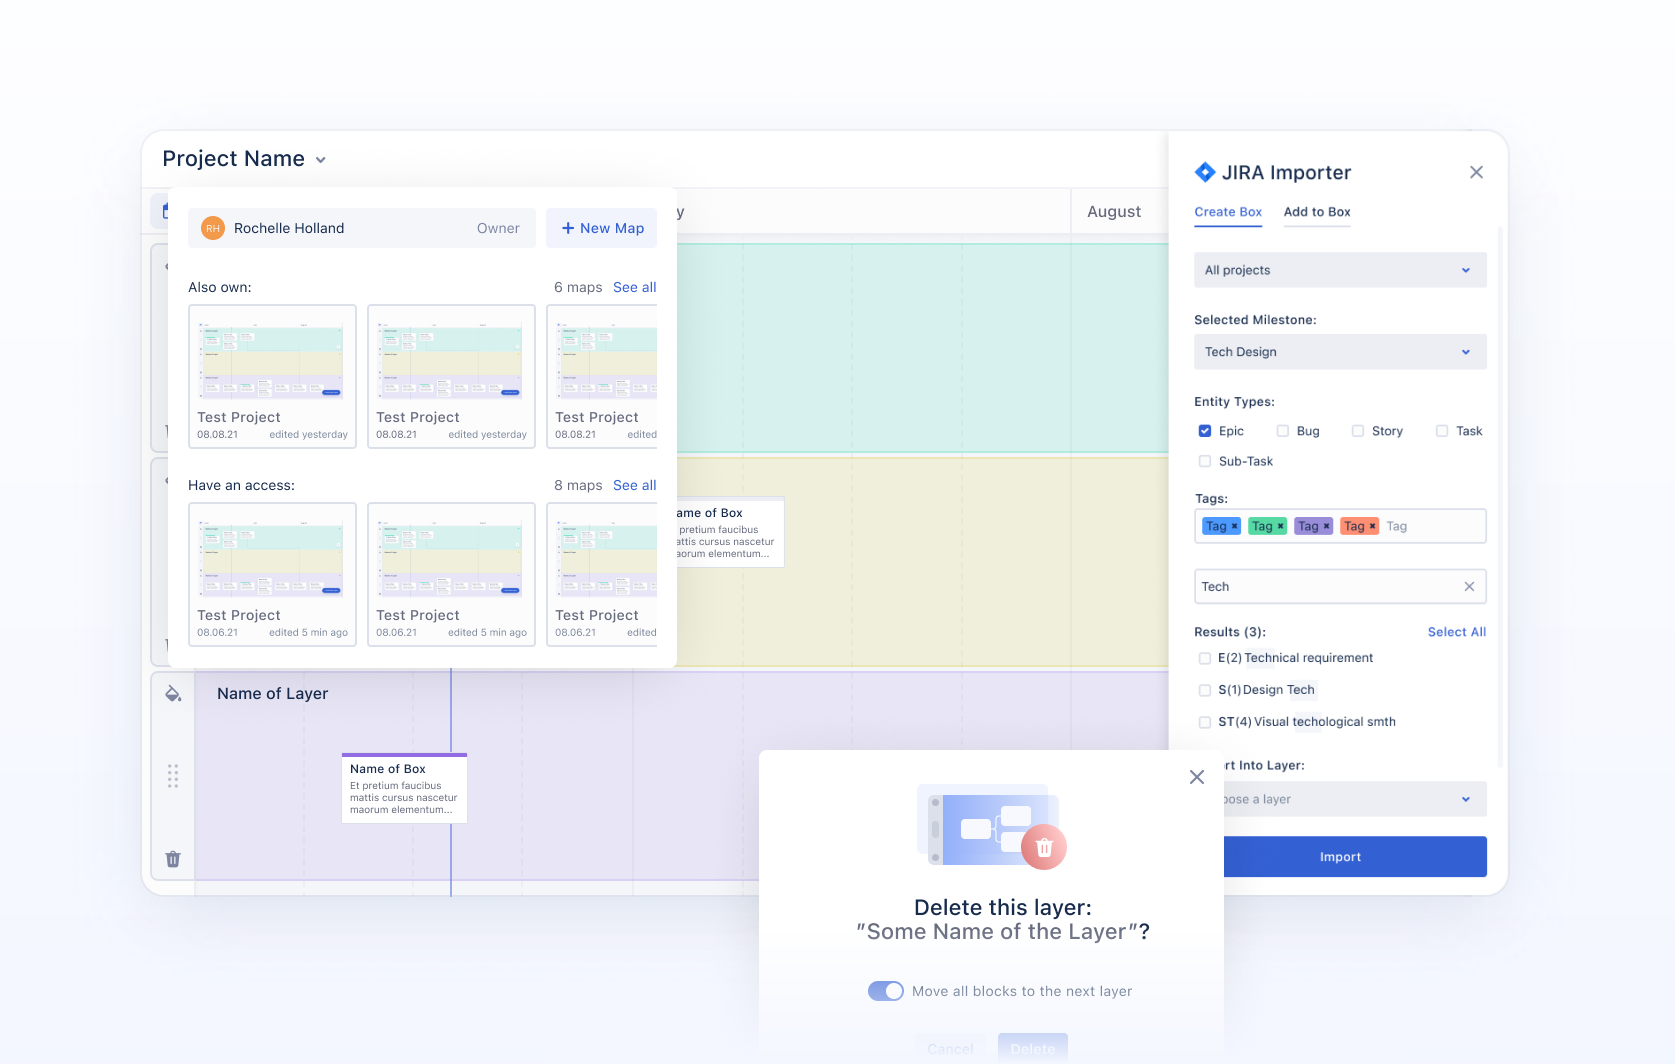
The main feature is the ability to import tasks right from Jira and create linked sub-items to non-epic JIRA objects, which either sub-elements of an epic or custom added JIRA objects to an unlinked box.
Our task was to make the threshold of entry into the product as low as possible; to show visually the connection with Jira; to create an aesthetic and easy-to-use product.
The main problem we came across is that the functionality is quite complex, different from the Jira’s logic, but despite this, it is necessary to show the visual connection. In addition, we need to understand how Jira works and know its intricacies.
UX Design and Visual Style
Initially, our client has already had a view of the product as a whole. They provided us with a wireframe draft that gave us the entire overview of the product. We were required to make the UI beautiful and modern, as well as improve the user experience where it is possible.
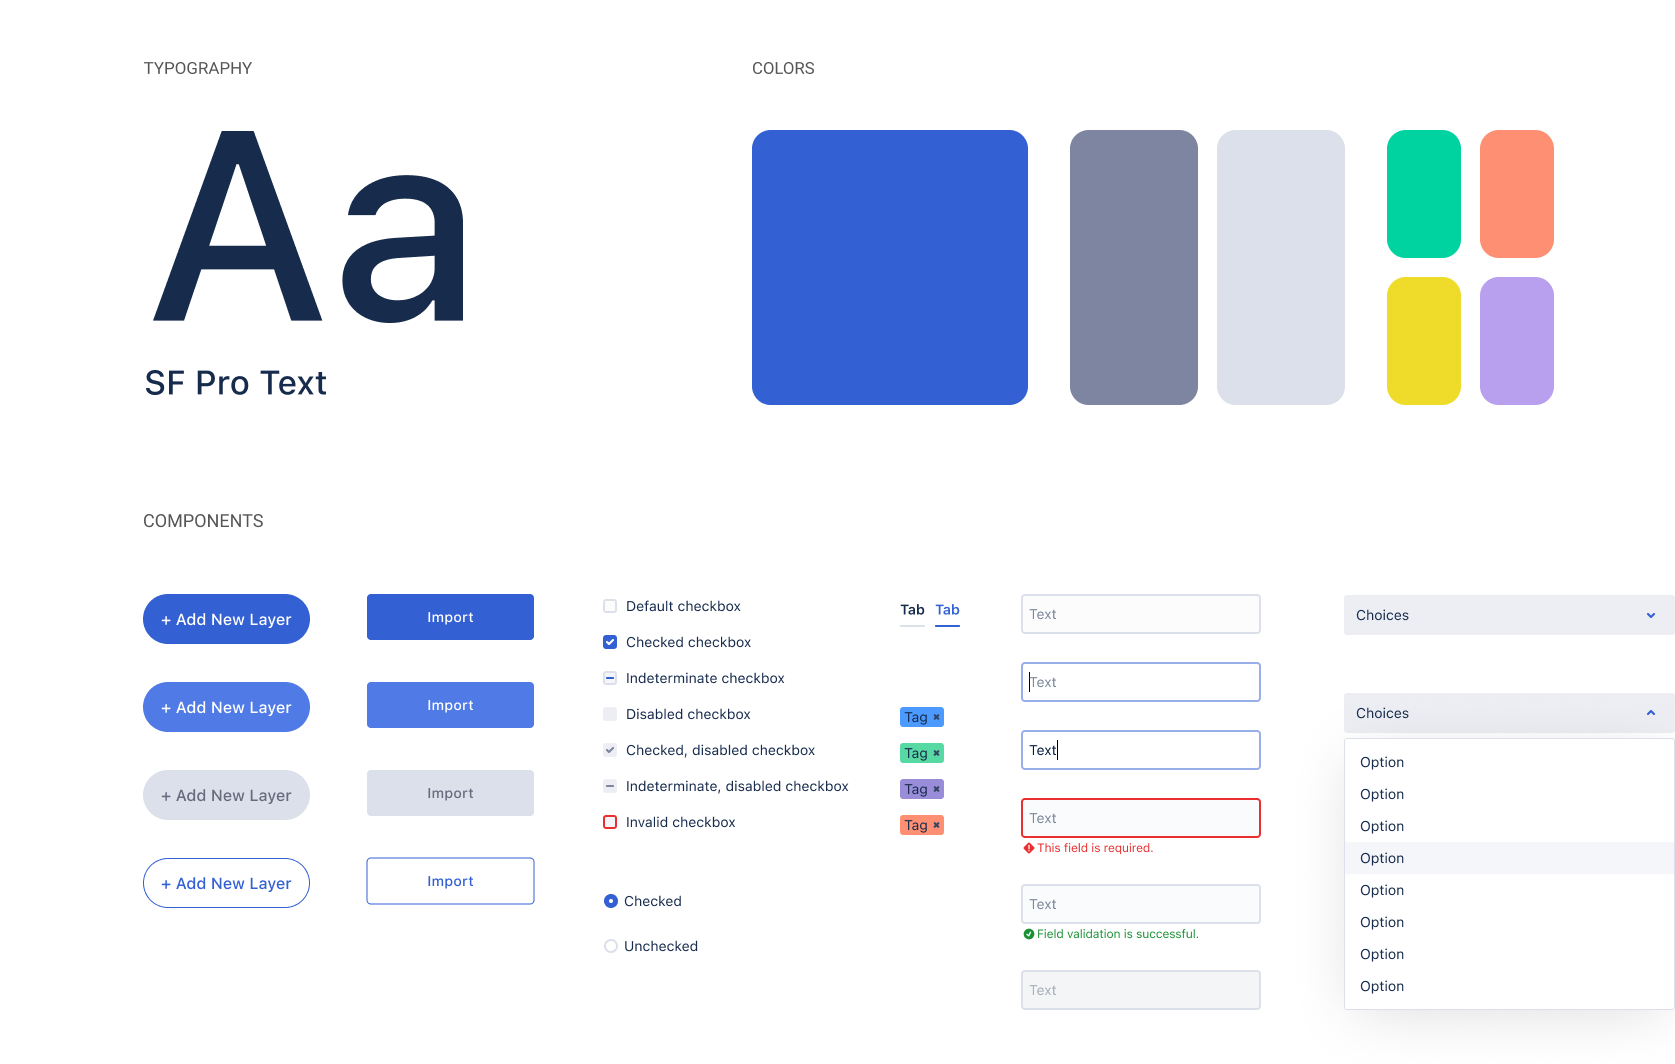
We have never come across certain specific tasks. But we decided it would be more logical to assume that visually the plugin should be identical to Jira, because in fact it is a continuation of the product. Therefore, we used the same font as in Jira, very similar colors, styles of buttons, fields and other components.
Globally, we didn't need to rebuild the UX, but to find any weaknesses and improve them. The main result of our work should be the intuitive interface.
Sometimes we don't pay much attention to things like courses and hover effects in design, but this time, we decided to focus definitely on them. The mouse pointer is intended not only to display the position of the cursor on the screen but also to inform the user about actions. It is important that it is easy for the user to identify and click on the required elements, and to encourage interaction with the content.
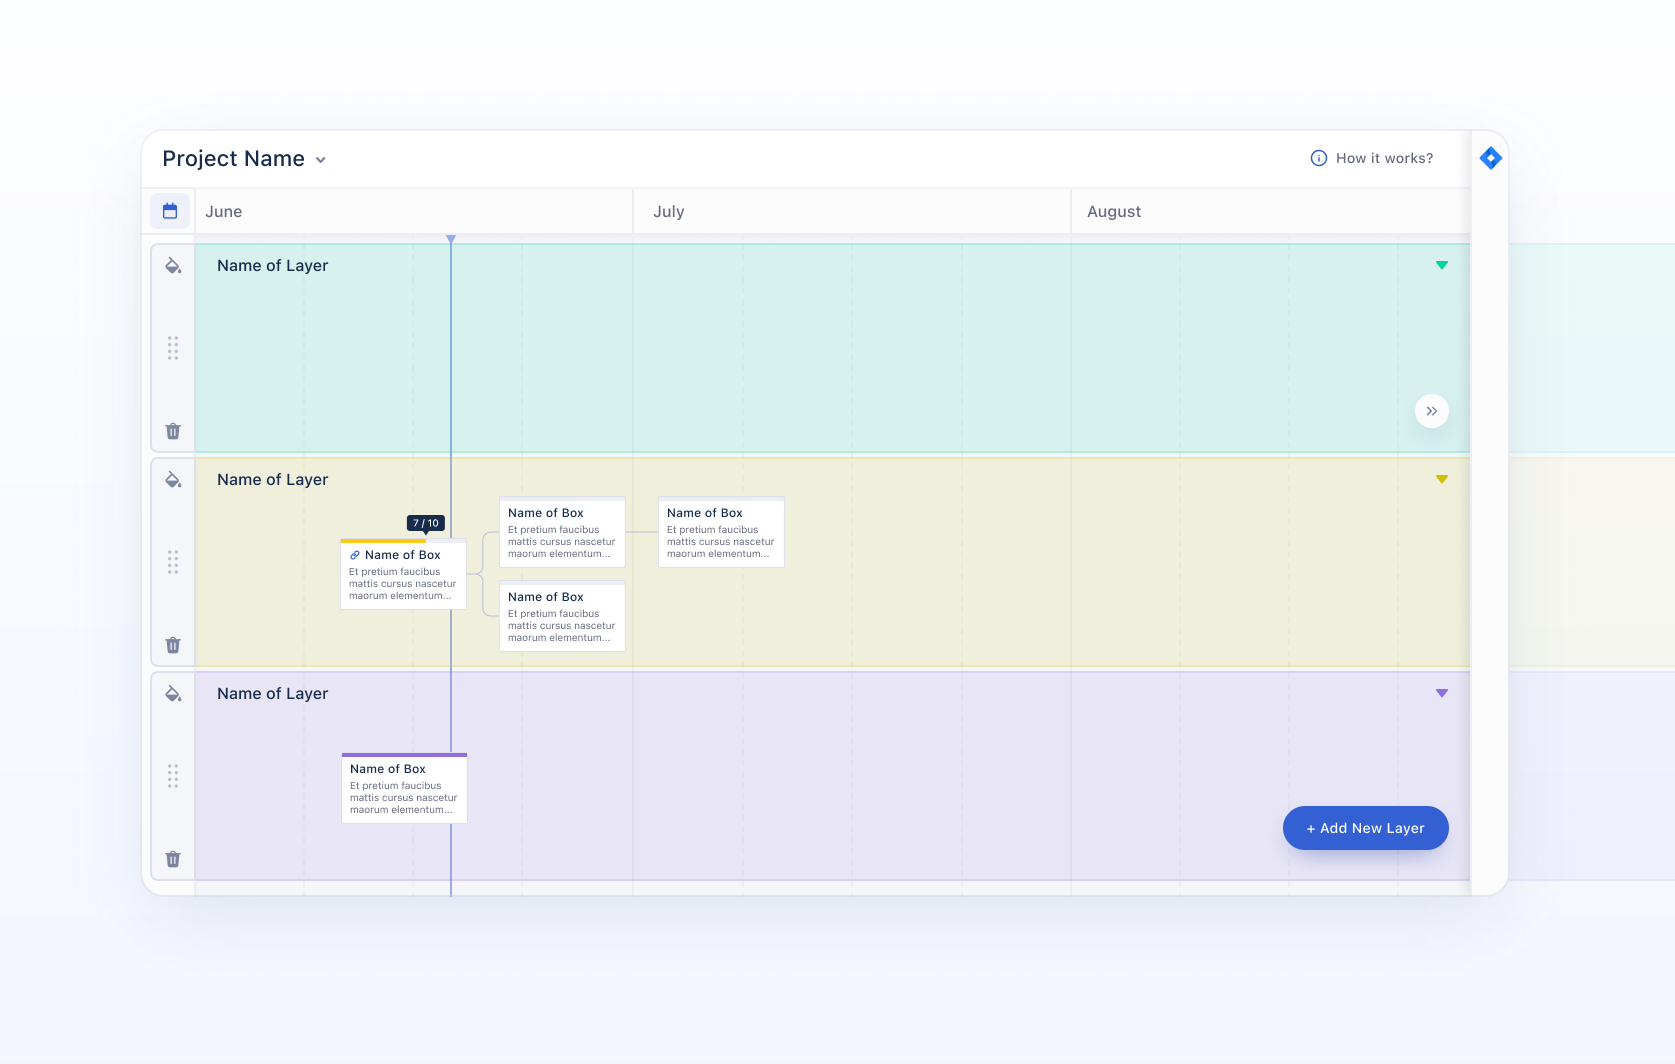
Layers
Definition: layers are the horizontal rows that each have their own distinct color (that are background and progressive fills of blocks). They represent different areas of expertise (or different tracks of work) in the system, that operate with different resourcing and expertise could have some overlap or shared dependencies (work that blocks future work).
There were some weaknesses:
- It was not intuitive that the user can add layers and how.
- Layers should let users know that they could be edited.
- How to change a background color.
- How to delete a layer.
- How to change a height.
First of all, we determined placement for each action in the most familiar way for users. The “add new layer” button is one of the basic actions, that’s why it should be visible all time. Due to that, we decided to use a floated active button for the creation of a new layer - a user has the opportunity to click on it whenever he wants.
Also, we placed all icons according to their value. For example, deleting is a destructive action and should be discreet, in the lower-left corner.
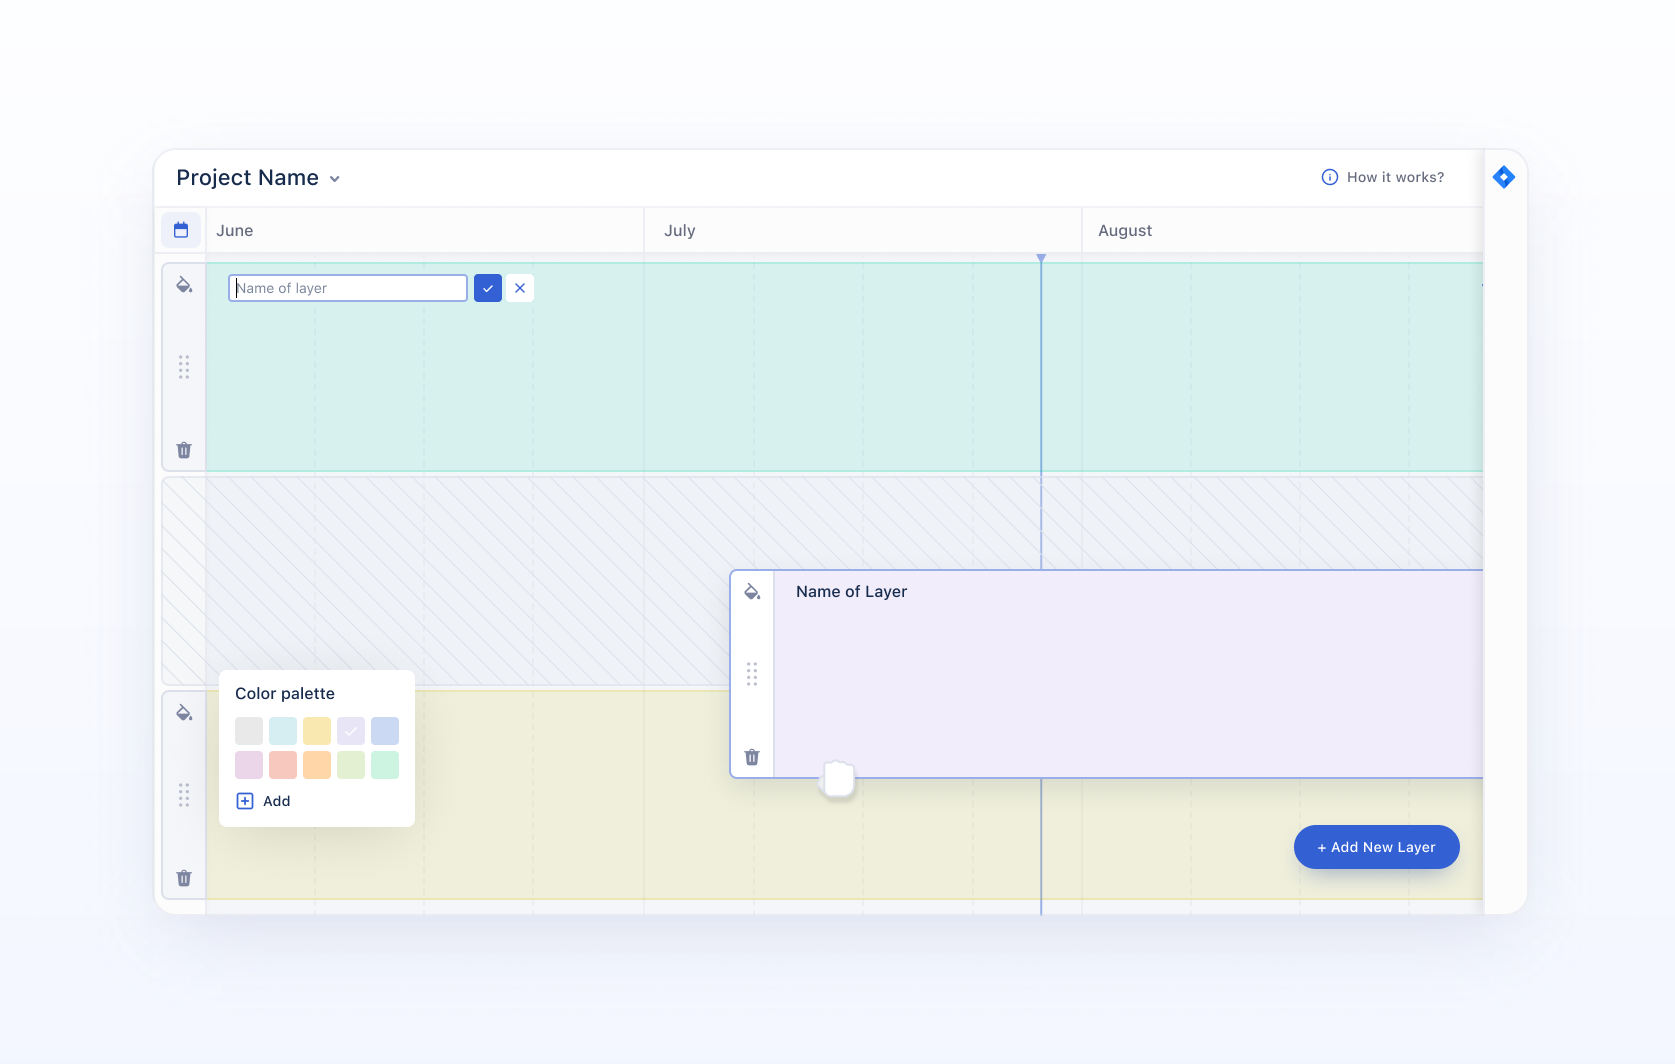
For editing layers' names, we used a power of hover effects - when the user's cursor hovers on name, it becomes caret. Click and the name becomes inside a text field.
Besides that, we developed two states for layers: normal and expanded. Users can change it by clicking on the arrow in the right corner - works like a dropdown.
And we worked the dragging process out. To show that it’s possible, we placed the 6-dots icon - one of the popular symbols for it. While clicking and holding, drag–and–drop cursor changes to a closed glove to indicate that a layer is grabbed. Additionally for this state we added a shadow. Free slots are also highlighted to show the user where he can leave a mouse and drop a layer.
Boxes
Definition: unlinked dumb box, or a box that has no connection at the box level from StoryMaps to the JIRA environment. Linked smart box, or a box that is linked directly to a JIRA Object (Boxes can only be linked to Epics).
Weaknesses:
- How to create a new box.
- Which are linked and which are not.
- Collapsed and expanded views.
- How to check the progress on the collapsed view.
- Showing subitems.
- Work with connection between boxes.
We determined the collapsed state as default: small tasks that locate on layers. With these boxes, we can build connections by drawing lines and, as a result, make a roadmap from tasks. The main idea is to build a straight-lined presentation of a job. How to add a new one? Again we used the hover effect for it - when a user hovers on free space on a layer the cursor becomes “+” and ghost slots are highlighted, so a user can select the right place for the next box clearly. For marking the linked/unlinked type of box we used the icon, as well as we put a thin progress bar at the top to show the degree of finishing.
Expanded view of boxes is presented in modal windows - more obvious approach for us and users. There are descriptions, links and subitems available inside this. Users can create bullet lists from small steps and keep themselves informed with the help of the progress bar. Interestingly, there are three steps of subitems: “to do”, “in progress” and “done”; to show it we used three states of checkboxes.

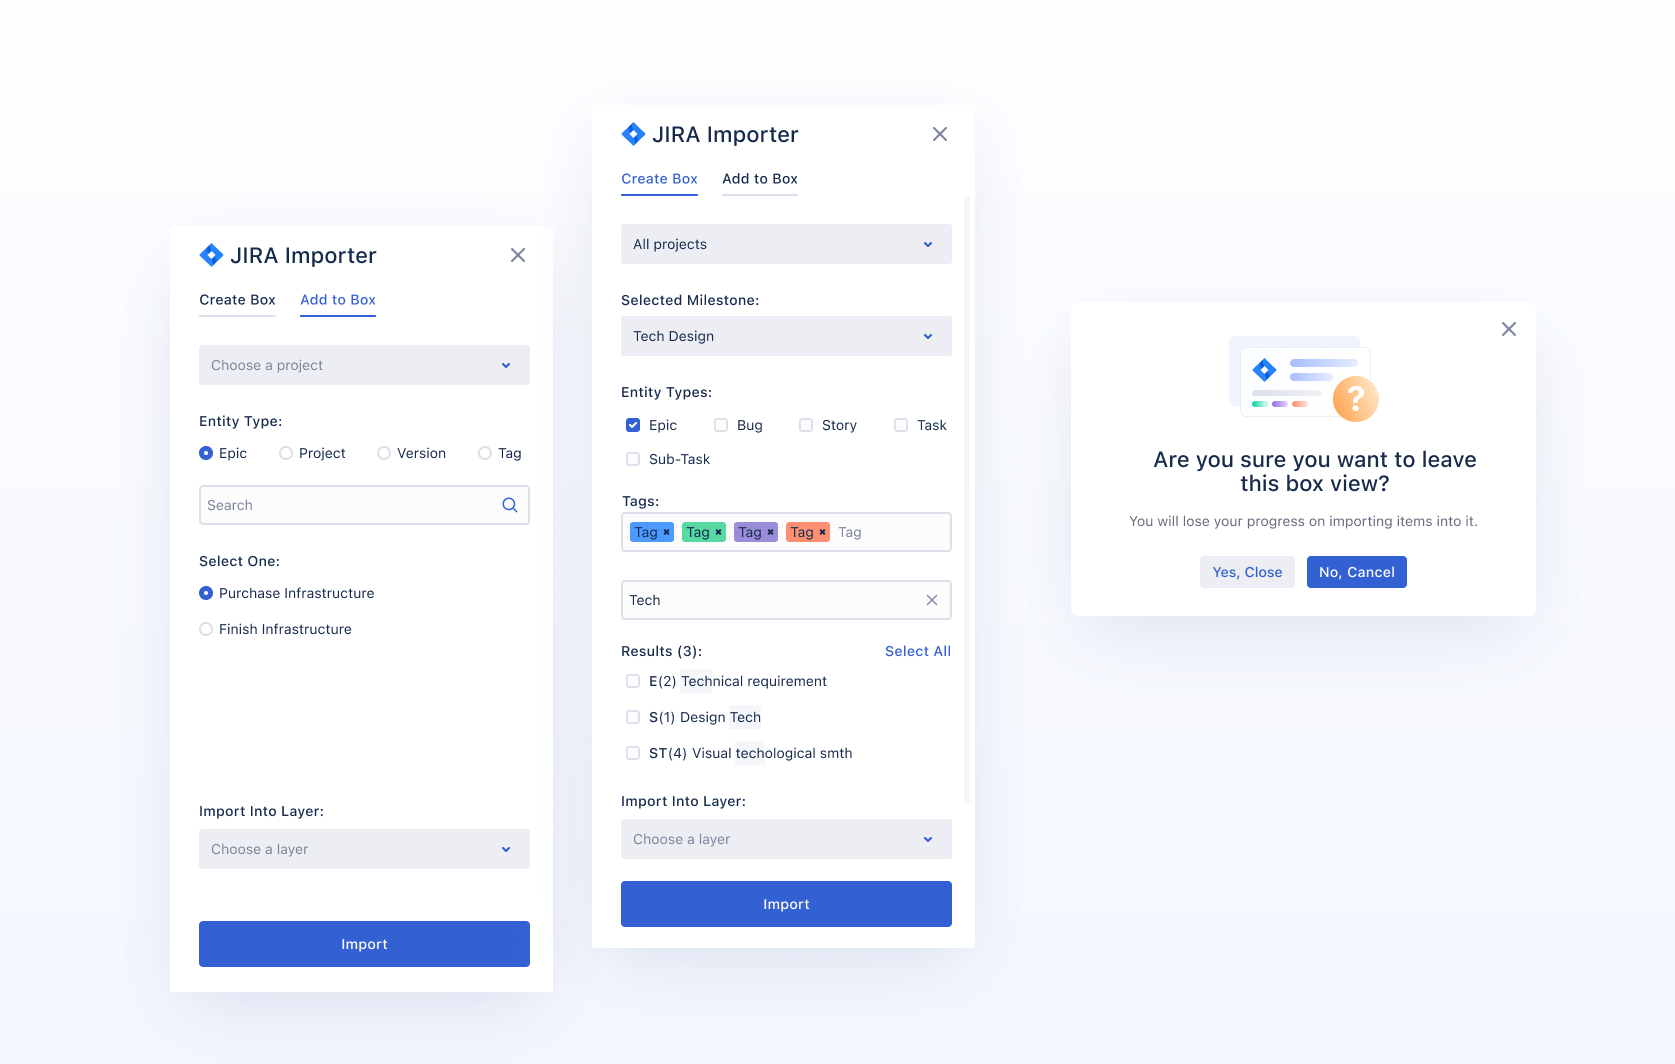
The main feature of this product, the sidebar for importing tasks from Jira, is hidden on the right side. It opens when user creates a new box and suggests two tabs: create “dumb” box simply or create “smart” box selecting parameters from there.
Onboarding
One of our goals was to make the first use as easy as possible - it’s not a trivial product with familiar patterns and people could be confused by the interface when starting to use it. That’s why the last task was to create a smooth and clear onboarding experience. We put all the info into small modal windows with suitable illustrations and highlighted described areas to focus the user's attention to them.
Conclusion
This project was an interesting challenge for us, we’ve learned Jira’s functionality from the new side as well as working with plugins at all. Moreover, we worked pretty well with microiterations, hovers, and cursors, that enriches our experience.
September 1, 2022